Repairing the Damaged Section
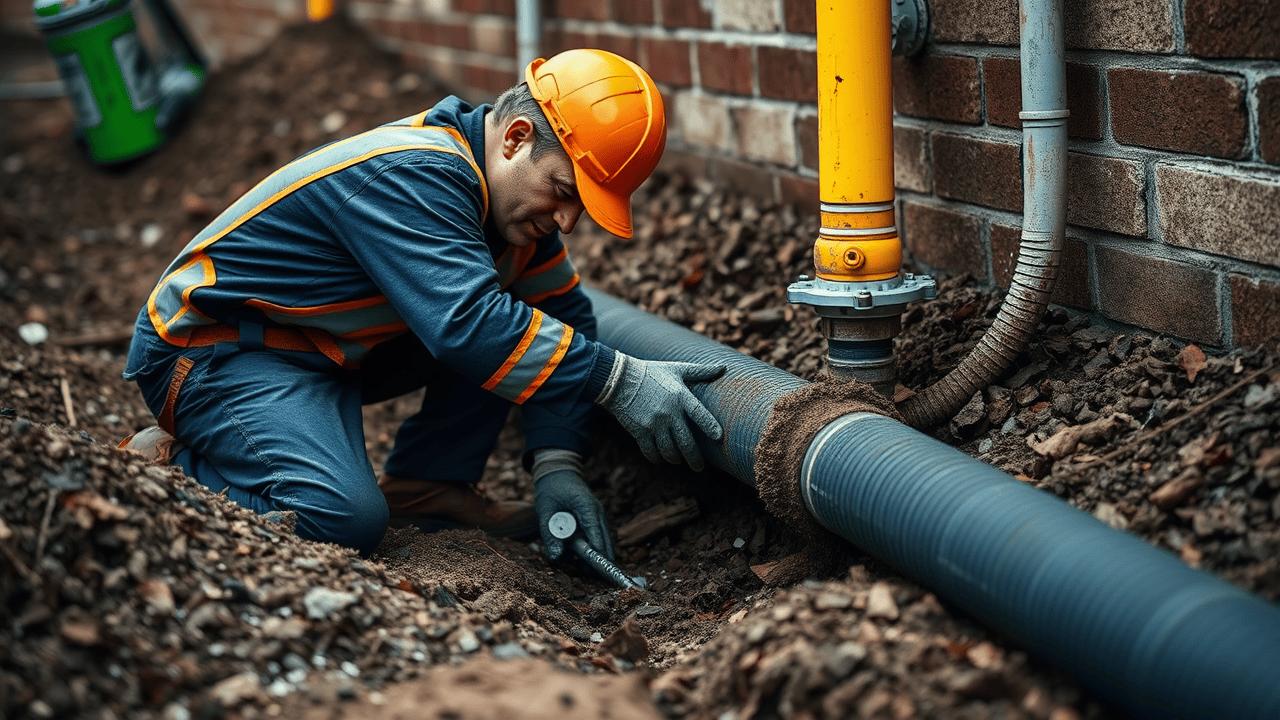
When addressing a damaged sewer pipe underground, the first step involves exposing the affected section. This might require digging a trench to reach the broken pipe. Ensure you follow local regulations regarding excavation and safety. It’s crucial to identify the exact location and extent of the damage before proceeding with repairs. This careful examination aids in determining whether a section of the sewer line needs replacement or if a less intensive repair will suffice. Sewer line installation and repair in residential areas typically involve adhering to strict guidelines to safeguard public health and prevent future issues.
Once the damaged section is exposed, select the appropriate repair method based on the severity of the break. For minor cracks, options such as using epoxy resin or other sealants can effectively extend the pipe's life. In cases where the damage is extensive, replacing the entire section may be necessary. Ensure you align the new pipe correctly with the existing sewer line to maintain a smooth flow. After securing the repair, it is vital to test the integrity of the installation. A proper repair minimizes the potential for future leaks or breaks, maintaining the efficiency of the sewer system.
StepbyStep Guide to Pipe Repair
Before beginning the repair process, assess the damaged section of the sewer pipe. Dig carefully around the area to expose the pipe without causing further damage. Once the pipe is accessible, clean the surface to ensure a proper seal during the repair. Depending on the type of damage, some methods may include using epoxy putty or replacing the affected section entirely. This upfront assessment is crucial to determine the best approach for the repair.
Sewer line installation and repair in residential areas often require specific techniques based on local regulations and the material of the pipe. If replacing a section of the pipe, measure and cut the new segment to fit accurately. Securely connect the new piece using appropriate fittings, ensuring there are no leaks. After the installation, retest the pipe for functionality by running water through the system. Monitoring for leaks and ensuring the flow is unobstructed are vital steps to confirm the repair was successful.
Testing the Repair
Once the repair is complete, testing the functionality of the sewer lines is crucial to ensure everything is working correctly. This can be achieved through a series of methods, such as visual inspections and pressure tests. A pressure test helps identify any potential leaks in the repaired area, ensuring that the integrity of the pipe has been restored. During this phase, it’s also important to check the flow of water and waste through the system to confirm there are no blockages.
Sewer line installation and repair in residential properties requires thorough testing before proceeding to backfill the repaired area. Observing for any unusual signs like slow drainage or foul odors can indicate underlying issues that need to be addressed. Regularly conducting these tests not only validates the repair work but also helps in maintaining the overall efficiency of the sewer system. Properly executed tests can save homeowners from future headaches and expenses related to sewer issues.
How to Ensure Proper Functionality
Once the repair is complete, it is essential to test the pipe to ensure that it functions correctly. Checking for leaks is the first step. This can be done by running water through the system and observing if there are any signs of leakage around the repaired area. Additionally, ensuring that the water drains smoothly is crucial. A blockage can indicate issues such as misalignment or debris remaining in the pipe.
Sewer line installation and repair in residential areas often requires thorough inspections to confirm the integrity of the fix. Using a camera to inspect the interior of the pipe can reveal any potential problem areas that may not be visible to the naked eye. If everything looks good, monitoring the system over the following weeks will help catch any unforeseen issues early on. This proactive approach helps maintain the health of the sewer system.
Backfilling and Restoring the Area
After successfully completing the pipe repair, the next step involves backfilling the excavation site. This process requires carefully layering soil in the trench around the repaired section. Start with coarse gravel or crushed stone at the bottom to facilitate drainage. Gradually add finer soil layers, compacting each layer to prevent future settling. Proper backfilling minimizes the risk of sinkholes and maintains the integrity of your yard.
Once the trench is filled, attention turns to restoring the area to its original state. This includes replacing sod, reseeding grass, or laying fresh landscaping material as needed. Taking time during this stage ensures that the surface looks natural and blends well with the surrounding environment. Always consult professionals if uncertain about the restoration process. For comprehensive maintenance, consider regular sewer line installation and repair in your area to prevent similar issues in the future.
Techniques for Proper Backfilling
Proper backfilling is crucial to ensure the integrity of the repaired sewer pipe. Start by using the right materials to refill the trench. Clean, granular soil is ideal, as it promotes drainage and prevents settling. Avoid using large rocks or debris that can compact unevenly and lead to surface issues later. Carefully place soil around the pipe in layers, compacting each layer as you go to minimize air pockets. This approach creates a stable environment for the sewer line while allowing for the natural movement of water.
Sewer line installation and repair in any area requires attention to details during backfilling. Monitor the moisture content of the soil. Too much water can lead to erosion and settling, while too little can create a dry, unstable surface. After backfilling, it’s wise to recheck the area for any signs of sinking or shifting. Maintaining a level surface avoids future complications. A well-executed backfill not only supports the installed sewer line but also helps maintain the overall landscape after the job is complete.
FAQS
What are the common signs of a broken sewer pipe?
Common signs of a broken sewer pipe include slow drains, unusual odors, wet spots in your yard, or sewage backups in your home.
How do I determine the location of a broken sewer pipe?
You can determine the location of a broken sewer pipe by looking for physical signs like wet areas or sinkholes, conducting a visual inspection with a camera, or hiring a professional to perform a sewer line inspection.
Can I repair a broken sewer pipe myself?
While some minor repairs can be done by homeowners, it is often recommended to hire a professional plumber for significant repairs to ensure safety and compliance with local codes.
How long does it take to repair a broken sewer pipe?
The time it takes to repair a broken sewer pipe can vary depending on the extent of the damage, but most repairs can take anywhere from a few hours to a couple of days.
What should I do if I suspect a sewer pipe is broken?
If you suspect a sewer pipe is broken, it’s best to stop using water in your home to prevent further damage and contact a professional plumber for inspection and repair.